+1 877-337-9312 | sale@sflbuild.com

Blog

What Are the 10 Best Sound Panels for Home Studios?

Choosing the right sound panels can make a home studio clearer, but panels are not magic. They reduce certain room reflections; they do not automatically block traffic, neighbors, or a noisy computer fan. A useful paraphrase of audio engineer and acoustics writer Ethan Winer’s published guidance is: “Treat the room to control reflections; do not expect panels to block outside noise.” That distinction matters.

This guide compares ten options for different rooms, budgets, and recording needs. It considers panel material, thickness, dimensions, mounting method, and published absorption information, while recognizing that manufacturers’ measurements may not be directly comparable. A thick panel above a desk may help tame a harsh reflection. A thin decorative panel may change the look more than the sound. Placement counts. So does the room itself.

The picks are intended as a practical starting point, not a substitute for listening or measurement. Check where reflections occur, then compare recordings before and after treatment. Listen again. A small bedroom with a bare window and hard floor will behave differently from a carpeted spare room, even with identical panels. Some products may suit speech better than music, and some setups will need bass treatment or rearranged furniture instead. No ranking can settle every case; this shortlist has limits, too. The sections ahead explain what to look for, which sound panels stand out, and where each choice may fall short.
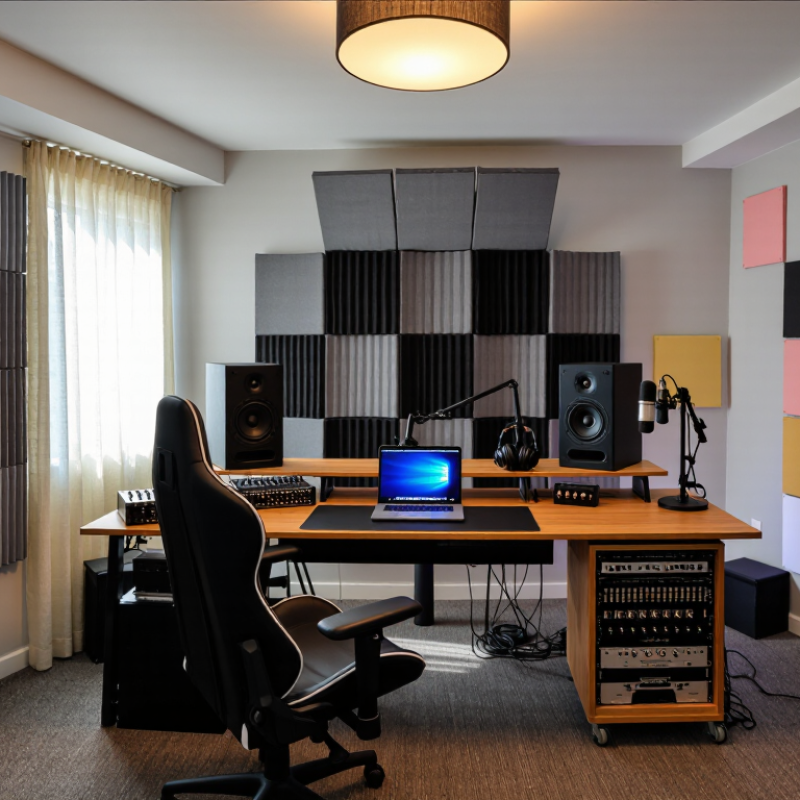
What Are the 10 Best Sound Panels for Home Studios?

Understanding How Sound Panels Improve Home Studio Acoustics

What Are the 10 Best Sound Panels for Home Studios?

Sound panels do not make a room silent; they manage reflections that blur recorded sound. A clap near a bare wall may return as a sharp flutter, while speech feels hollow. Absorptive panels soften these early reflections, helping vocals and acoustic instruments sound clearer. Small changes matter. The goal is controlled liveliness, not a room with every surface deadened.

Placement often matters more than covering every wall. Sit at your recording position and identify where sound bounces from the side walls. Place panels at those first-reflection points, and consider a ceiling cloud above the desk. Thicker absorbers or corner bass traps can help with low-frequency buildup; thin panels rarely tame deep bass. Check the room with familiar tracks and spoken recordings, then move one panel at a time. Trust your ears, but verify with measurements when possible.

Panels cannot block outside traffic or stop sound reaching neighbors; that requires isolation, sealing, and construction. A treated room may still have uneven bass, especially near corners. That is normal—and worth revisiting. Start with a few well-placed panels, keep notes on what changes, and resist treating guesses as facts.
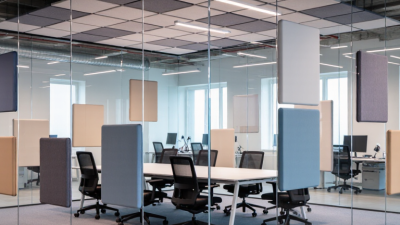
How Panel Depth Relates to Sound Frequency

The bars show the theoretical quarter-wavelength distance, calculated using a sound speed of 343 m/s. This is a useful illustration of why low-frequency sound generally requires thicker absorbers or an air gap. It is a physics reference, not a guarantee of panel performance; actual absorption depends on materials, construction, placement, and frequency.

Assessing Your Room’s Acoustic Treatment Needs

Before choosing sound panels, map what the room is doing. Measure its length, width, and height, then note hard surfaces, windows, and large furniture. A desk against a wall can create strong early reflections. Bass may also gather in corners, even when the room sounds clear.

Listen, but verify. A hand clap can reveal a sharp echo; it cannot measure decay accurately. The European Broadcasting Union’s Tech 3276 report gives a 0.2–0.4-second reverberation-time range for professional listening rooms. Treat that as a reference, not a universal home-studio target. Room size and use matter. ISO 3382-2:2008 describes methods for measuring reverberation time in ordinary rooms. A measurement microphone and frequency sweep can show whether decay varies across bass, midrange, and treble. That detail matters: thin panels may tame flutter echoes while leaving low-frequency buildup largely untouched.

Mark first-reflection points on the side walls and ceiling, then compare measurements before and after treatment. Do not cover every surface by instinct. An overly dead room can feel unnatural. I would question any plan based only on panel count; placement and absorption depth deserve equal attention. One overlooked hard tabletop can still bounce sound toward the listening position.

Comparing the 10 Best Sound Panels for Home Studios

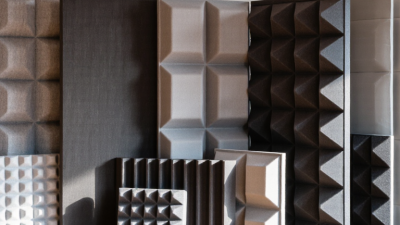
Comparing the 10 best sound panels for home studios means comparing what they absorb, not just how they look. Thick mineral-wool and fiberglass panels generally suit early reflections and mid-to-high frequencies. PET-fiber panels offer a lighter alternative, while foam wedges are easy to mount but may do little for deep bass. Bass traps target low-frequency buildup in corners; ceiling clouds reduce reflections above a desk. Slatted and perforated panels combine absorption with a reflective face, so their performance depends on the backing and air gap. Thin fabric-wrapped panels are neat, but often less effective at lower frequencies. Portable screens help around a microphone, yet cannot control the whole room. Different jobs.

For objective comparisons, check test data measured under ISO 354 and the rating method in ISO 11654. The latter’s Class A category begins at a weighted absorption coefficient of 0.90. That figure is a laboratory rating, not a promise of identical results in a small, furnished studio. Thickness, mounting distance, coverage, and room geometry all matter. Depth matters. A 50-mm panel with an air gap may behave differently from the same panel fixed flat against a wall.

I would not rank all ten as one simple ladder: a bass trap cannot replace a ceiling cloud. One limitation is that product sheets may emphasize a single rating and hide frequency-by-frequency results. Compare absorption data by frequency, then consider placement and available wall space. The best choice may be less visually striking, and I admit that is not always the first thing people notice.

What Are the 10 Best Sound Panels for Home Studios? - Comparing the 10 Best Sound Panels for Home Studios

This comparison covers common, unbranded panel designs. Sizes are typical formats, and acoustic performance varies with materials, installation, room, and test method. Absorption panels reduce room reflections; they do not soundproof a room or block sound through walls.

# Panel type Typical size / thickness Typical construction Best suited for Strengths Limitations
1 Fabric-wrapped broadband panel Commonly 24 × 48 in (61 × 122 cm); about 2 in (5 cm) thick Porous absorber, such as mineral wool or fiberglass, inside a breathable fabric covering First-reflection points and general room treatment Versatile; helps control mid- and high-frequency reflections while adding some lower-mid absorption A thin panel has limited effect on deep bass
2 Thick broadband panel Commonly 24 × 48 in (61 × 122 cm); about 4 in (10 cm) thick Deeper porous absorber, often with an air gap behind it Small mixing rooms needing broader frequency control Typically absorbs a wider frequency range than a thinner panel of similar construction Takes up more space and is heavier than a thin panel
3 Extra-thick absorber panel Commonly 3–4 ft (91–122 cm) wide; about 6 in (15 cm) thick Thick porous core, sometimes installed with an air space behind it Rooms where low-midrange reflections are difficult to manage Greater depth can improve absorption at lower frequencies compared with a thinner panel Bulky; still not a substitute for room-specific bass treatment
4 Corner bass trap Often 12–24 in (30–61 cm) deep across the corner; height varies Thick porous absorber fitted across or into a room corner Reducing low-frequency buildup in corners Uses corner space and can provide more low-frequency absorption than a thin wall panel Requires substantial depth; results depend on room modes and placement
5 Ceiling cloud panel Commonly 24 × 48 in (61 × 122 cm); about 2–4 in (5–10 cm) thick Fabric-wrapped porous absorber suspended above the listening or recording area Ceiling reflections over a desk, vocal position, or instrument area Treats a reflection surface that is often left untreated in home studios Needs secure mounting and adequate ceiling clearance
6 Acoustic foam panel Commonly 12 × 12 or 12 × 24 in (30 × 30 or 30 × 61 cm); about 1–2 in (2.5–5 cm) thick Lightweight open-cell foam, often with a wedge or pyramid surface Reducing flutter echo and bright reflections in compact spaces Lightweight and easy to place on walls Thin foam mainly affects higher frequencies and does little to control deep bass
7 Slatted absorber panel Commonly 24 × 48 in (61 × 122 cm); about 2–4 in (5–10 cm) overall depth Wooden slats over a porous absorbing layer, with gaps between slats Studios needing a finished wood appearance and controlled reflections Combines a hard slatted face with absorption behind it; appearance can suit visible studio walls Heavier and generally more costly to build than a simple fabric-wrapped panel
8 Perforated-face absorber Panel dimensions vary; commonly about 2–6 in (5–15 cm) deep Perforated rigid facing backed by an air cavity or porous absorber Targeted treatment where a durable, cleanable surface is useful Can be designed to absorb a selected frequency range while protecting the absorber Performance depends strongly on hole pattern, cavity depth, and backing material
9 Diffuser-absorber panel Commonly 24 × 48 in (61 × 122 cm); depth varies by design Uneven or shaped face combined with an absorptive backing or cavity Rooms that need reflection control without making every surface equally absorptive Can scatter some sound while absorbing part of the incident energy Effect depends on panel depth and design; shallow shapes do not meaningfully diffuse long wavelengths
10 Portable freestanding absorber Often about 24 × 48 in (61 × 122 cm); typically 2–4 in (5–10 cm) thick Porous absorber in a rigid frame with feet or a movable stand Flexible recording setups, rented rooms, and temporary vocal areas Can be repositioned or stored; does not require permanent wall mounting Uses floor space and may need a stable base to prevent tipping

Choosing Panels for Recording, Mixing, and Budget

For recording, choose panels that control reflections without making the room unnaturally dull. A pair of absorbers at the side-wall reflection points can reduce sharp flutter and room coloration. Place another panel behind the microphone if a nearby wall creates a hollow, boxy tone. Thin foam may soften high frequencies, but it will not solve deep bass problems. That matters.

For mixing, aim for a balanced room rather than silence. Thicker broadband panels and corner bass traps can help manage low-frequency buildup, especially near corners and the wall behind speakers. Sit in your usual listening position and compare what you hear before and after placement. A clap test can reveal obvious echoes, while careful listening to familiar tracks offers a useful reality check. Neither test is perfect. Small rooms behave stubbornly.

Budget choices work best when they address the room’s actual problems. Start with a few well-placed panels, then add more only if recordings or mixes still sound uneven. Check panel thickness, safe mounting, and published absorption data; appearance alone tells you little. DIY panels can cost less, but dense, suitable insulation and secure construction matter. I have seen rooms improved by modest treatment, though results vary with room shape, furniture, and placement. Panels reduce reflections; they do not block outside noise or make a room soundproof.

Planning Panel Placement for Clearer Studio Sound

Panel placement matters more than covering every wall. Sit at your normal mixing position and ask someone to move a small mirror along each side wall. Where you see a speaker’s reflection, place a broadband panel near ear height. Repeat on the ceiling above the listening position. Start with reflections. Keep the stereo image centered.

Low frequencies need a different plan. Thick absorbers in room corners can help control bass buildup, while thin panels mainly reduce higher-frequency reflections. Leave an air gap behind panels when practical; it can improve absorption at lower frequencies. Do not expect panels to block outside noise. They treat sound inside the room.

Use measurements as a guide, not a guarantee. ITU-R BS.1116-3, a professional listening-room recommendation, gives a reverberation-time range of 0.2 to 0.4 seconds from 200 Hz to 4 kHz for small critical-listening rooms. A home studio may differ in size and furnishings, so check decay with measurement software and listen to familiar vocal recordings. The mirror test is useful, but it can mislead around doors and windows. I may still move a panel twice. Make one change at a time, then compare.