Top 5 Acoustic Panels Ceiling Tips for Better Sound Quality?
In the world of soundproofing, the placement of acoustic panels ceiling can significantly impact audio quality. According to a report by the Acoustical Society of America, proper panel installation can reduce unwanted noise by up to 50%. This highlights the importance of understanding how to optimize their effectiveness in various spaces. Industry expert Dr. James Harmon states, "Effective acoustic paneling is not just about aesthetics; it’s about creating an environment conducive to sound."
Many professionals overlook the critical factors that influence acoustic performance. Panel placement, material selection, and room geometry all play vital roles. For instance, installing panels in corners often yields better sound absorption due to the way sound waves interact with surfaces. While it's easy to get caught up in design, the functionality of acoustic panels ceiling should remain a priority.
Failure to address these aspects can lead to disappointing results. Acoustic panels can enhance sound clarity when properly installed. However, neglecting the space's characteristics may lead to poor sound quality. The journey to improved acoustic environments begins with informed decisions about panel placement and materials.
Understanding Acoustic Panels: How They Improve Sound Quality
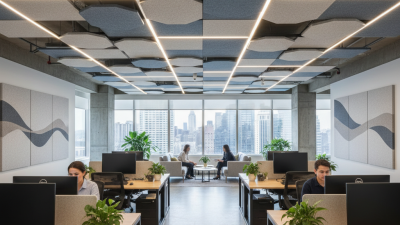
Acoustic panels are essential for improving sound quality in various spaces. These panels absorb sound waves, reducing echoes and reverberation. By strategically placing them on ceilings, you can create a more balanced audio environment. The material composition of these panels is crucial. They are commonly made from foam or fabric, which influences their effectiveness.
When considering installation, think about room size and shape. Larger rooms may require more panels to achieve optimal sound. Some may overlook the importance of panel placement. Randomly installed panels can lead to uneven sound distribution. Proper alignment enhances their performance significantly. It's worth noting that aesthetics also play a role. You can choose colors or designs that complement your space while ensuring functionality.
However, there can be downsides. Sometimes, the panels may not absorb all frequencies equally. This can lead to a “hollow” sound. The thickness of the panel also affects its sound absorption capacity. Thicker panels generally absorb lower frequencies better, but they must be carefully placed to avoid overcrowding a room. Finding a balance between aesthetics and functionality is key to achieving the best results.
Factors to Consider When Choosing Acoustic Panels for Ceilings
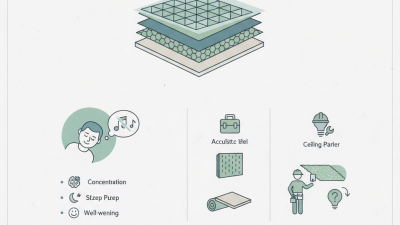
When selecting acoustic panels for ceilings, there are several crucial factors to consider. First, the material of the panel plays a significant role in sound absorption. According to a study by the National Institute of Standards and Technology, panels made from foam or fiberglass absorb up to 80% of sound waves. This makes them ideal for reducing echo and improving sound clarity in music studios and home theaters.
Another important aspect is the thickness of the panels. Thicker panels typically outperform thinner ones in low-frequency absorption. A recent report from the Journal of Architectural Acoustics highlights that panels with a thickness of at least two inches can effectively manage low-frequency sounds, which is vital in large, open spaces.
It's also important to evaluate the installation method. Adhering panels directly to the ceiling is a common practice, but suspended panels can also offer benefits. Suspended panels help to create an air gap that enhances sound absorption. Consider your room's layout and acoustic needs. Reflect on your specific requirements and test different options, as the perfect solution often lies in personalized choices.
Top 5 Acoustic Panels Ceiling Tips for Better Sound Quality
Ideal Placement Strategies for Acoustic Panels in a Room
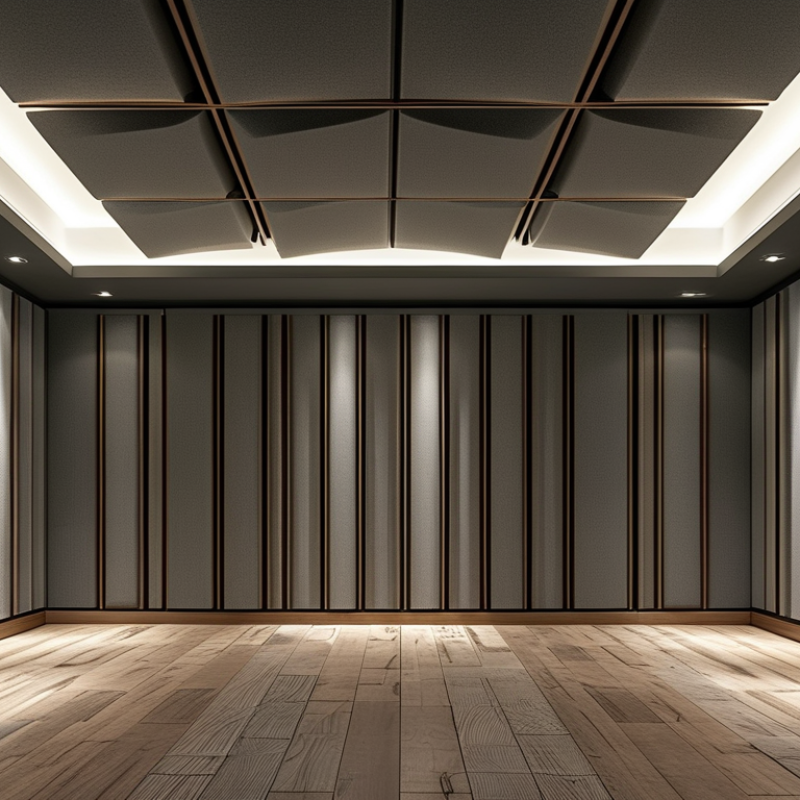
When considering the placement of acoustic panels in a room, understanding sound behavior is essential. Sound waves bounce off hard surfaces, causing echoes and unwanted noise. Placing panels strategically can significantly improve sound quality. Start by identifying the reflection points. These areas are usually where parallel walls meet. Use a mirror to help spot these points easily.
Position panels at ear level to maximize effectiveness. This level is where most sound perception occurs. Concentrate on walls opposite windows and doors, as they typically contribute to sound leakage. Don't forget the ceiling. Hanging panels at strategic locations can help absorb sound that travels upward.
It's crucial to avoid overloading one area with too many panels. This may lead to a dampened acoustic experience. Instead, create a balanced setup to achieve a harmonious sound profile. Placement may require testing different configurations. Listen carefully for any areas that still feel echoey. Some trial and error will provide valuable insights. Ultimately, effective panel placement can transform your space into a sound-friendly environment.
Maximizing Sound Absorption with Panel Materials and Thickness
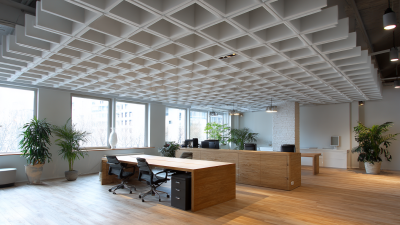
To improve sound quality, the choice of materials for acoustic panels is critical. Different materials absorb sound at varying frequencies. For example, fiberglass panels typically perform well in mid to high frequencies, while foam panels excel in higher frequencies. According to a report by the Acoustical Society of America, altering panel thickness can increase absorption. A thicker panel, often more than 2 inches, can significantly enhance low-frequency absorption by up to 50%.
When considering installation, placement matters too. Panels should be distributed evenly across the ceiling to optimize sound diffusion. Research indicates that covering 25% of the ceiling area with appropriate panels can lead to a noticeable reduction in echo. This combination of material choice and strategic placement is vital for achieving the best acoustic outcomes.
However, there can be issues with aesthetics and cost. Thick panels may overpower a room’s design, and high-quality materials can be expensive. Finding the balance between effectiveness and visual appeal requires careful planning. Reflecting on your specific needs may lead to realizing that cheaper, thinner materials may not yield the desired results.
Maintenance Tips for Long-Lasting Acoustic Panel Performance
Maintaining acoustic panels is crucial for ensuring their longevity and optimal performance. Regular cleaning helps prevent dust accumulation, which can diminish sound absorption. Use a soft brush or a vacuum with a brush attachment to gently remove dirt. This simple step can improve your panels' effectiveness.
Humidity and temperature can affect acoustic panels' materials. Keep them in a stable environment. Extreme changes can lead to warping or damage. If a panel appears misshapen, reflect on its placement and the room’s climate. Consider adjusting the humidity levels to maintain their structure.
Inspect panels periodically for any signs of wear. Look for discoloration or sagging, which indicates that it's time for replacement. Professional installation can enhance performance, but improper use or neglect can negate those benefits. Understanding the panel's material can guide you to better care practices that will ensure they serve effectively for years to come.
Top 5 Acoustic Panels Ceiling Tips for Better Sound Quality
| Tip |
Description |
Maintenance Frequency |
Expected Lifespan |
| Positioning |
Place panels in corners and along walls to reduce echoes. |
Every 6 months |
5-10 years |
| Cleaning |
Dust panels with a soft cloth; avoid harsh chemicals. |
Monthly |
5 years |
| Humidity Control |
Keep humidity below 60% to prevent mold. |
Monitor weekly |
Indefinite if maintained |
| Installation |
Ensure panels are securely mounted to avoid sagging. |
Check annually |
10 years |
| Repositioning |
Adjust panel placement based on room usage changes. |
As needed |
Variable |