
+1 877-337-9312 | sale@sflbuild.com

Blog

How to Choose a Duraband Nozzle Band Heater in 2026?

Choosing a Duraband Nozzle Band Heater in 2026 starts with the nozzle, not the product photo. Measure the barrel diameter and heated length. Check available voltage, wattage, lead position, and clearance around the machine. Small mismatches matter. A heater that fits poorly can create uneven contact, slow heat transfer, and frustrating temperature swings.

The U.S. Department of Energy’s Improving Process Heating System Performance: A Sourcebook for Industry treats process heating as an important part of manufacturing energy use and recommends evaluating the full heating system, not a component in isolation. That is useful context for injection molders: heater selection affects more than the replacement part. It can influence warm-up time, temperature stability, and maintenance planning. John Bozzelli, an injection-molding educator known for promoting scientific molding, emphasizes measurement-led process control in his work. A practical selection reminder follows: “Measure the nozzle before matching the heater.” This is an editorial rule of thumb, not a verbatim quotation from Bozzelli.

In this guide, we’ll compare band dimensions, watt density, insulation, termination options, and operating conditions. We’ll also flag the details buyers sometimes overlook, such as thermocouple placement and space for wiring. No catalog spec can replace a careful fit check. Even a familiar setup deserves another look in 2026.
How to Choose a Duraband Nozzle Band Heater in 2026?

Define the Application and Operating Conditions for a Duraband Nozzle Heater

Define the application before choosing a nozzle band heater. Note the nozzle’s outside diameter, heated length, and available clearance. Measure the actual surface rather than relying on an old drawing. Even a small fit gap can slow heat transfer and create uneven temperatures. What material passes through the nozzle, and what temperature does the process require? These details shape the heater’s wattage and temperature rating.

Check the operating conditions, too. Record supply voltage, expected heating cycles, ambient temperature, and exposure to drafts or nearby cooling lines. Allow room for leads and sensors, and confirm the heater can be clamped securely without obstructing adjacent equipment. A built-in thermocouple may suit some setups; others need an external sensor positioned close to the heated zone. Check sensor compatibility with the controller.

Keep a small margin for real-world variation. It is tempting to size everything from the ideal production setting, but startup delays and frequent stops can change demand. That detail is easy to miss. Review the heater’s rated limits and installation instructions with a qualified technician before fitting it. If dimensions or process temperatures are uncertain, measure again; guessing here can mean uneven heating or premature wear.

How to Choose a Duraband Nozzle Band Heater in 2026?

Define the Application and Operating Conditions

Start by identifying the resin and its required melt-processing temperature. The ranges below are representative starting points; actual requirements vary by grade and process. These are material melt temperatures—not heater surface-temperature settings.

Selection tip: Also check nozzle dimensions, available power, temperature-control method, heat loss, and the machine’s operating cycle. Confirm the heater’s required temperature and fit with the resin supplier and equipment specifications.

Measure the Nozzle and Confirm the Required Heater Dimensions

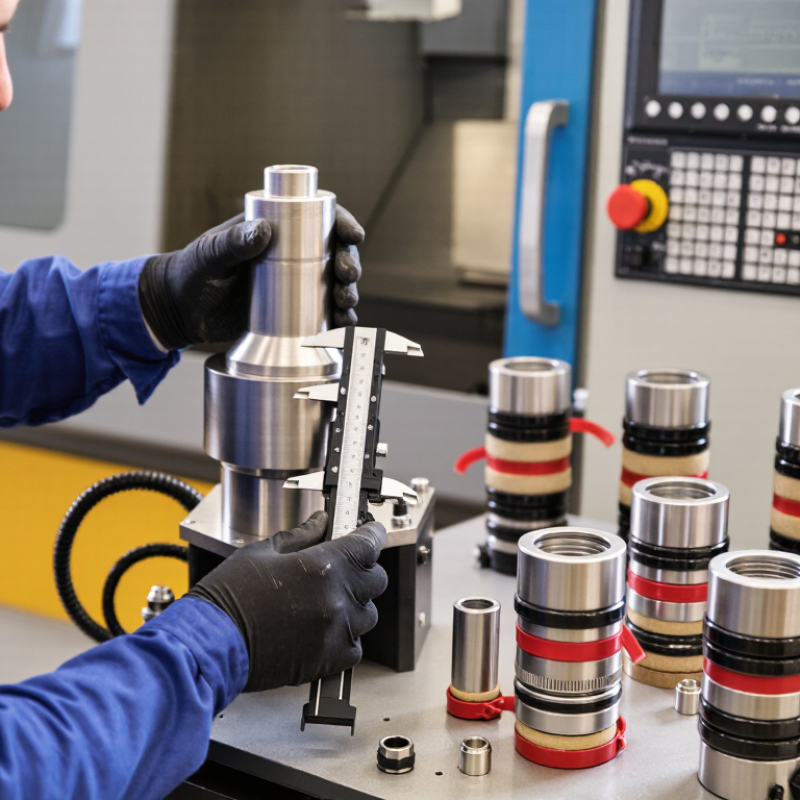
Measure the nozzle’s outside diameter across the exact heated land, not the hex or shoulder. Take readings in two directions and near both ends; a slightly oval nozzle can leave a loose strip. Record the heated length, available clearance, clamp gap, lead exit direction, and thermocouple position. Use a calibrated caliper, and note whether dimensions were taken cold. Small mismatch matters. ISO 1:2016 sets 20°C as the reference temperature for geometrical product specifications, so record shop conditions when comparing measurements. NIST structural-material data gives 304 stainless steel a mean thermal-expansion coefficient near 17.3 µm/m·°C. A 50 mm nozzle heated by 180°C could grow about 0.16 mm in diameter. Treat that figure as an estimate, not a fit allowance.

Match the heater’s stated inside diameter and heated length to the measured nozzle, then check the supplier’s required fit and clearance. Do not assume a nominal nozzle size tells the whole story. A coating, repair, or worn surface can change contact. If the nozzle tapers, measure at several points and share the readings with the heater supplier. Leave room for the clamp and wiring without forcing the band into place. One detail is easy to miss: a heater that closes unevenly may show a gap even when its listed dimensions seem correct. Recheck before ordering; measurements can be imperfect, and I would question a single reading.

Compare Duraband Heater Materials, Wattage, and Heat Distribution

Choosing a nozzle band heater in 2026 starts with the barrel, not the catalog photo. Stainless-steel outer shells resist corrosion and suit many general-purpose production lines. Brass transfers heat quickly, but may be less suitable when cleaning chemicals or demanding temperatures challenge the assembly. Ceramic-insulated designs can support higher operating temperatures and limit heat loss, though warm-up behavior varies by construction. Check the rated temperature range, insulation, and dimensions against the actual machine. Close fit matters. A loose band can create uneven heating and waste energy.

Tips: Measure the nozzle diameter and heated length, then confirm the heater’s inner diameter and voltage. Compare wattage with the machine’s requirements, not just the previous heater’s label. Small details matter. Keep wiring and sensor placement in mind.

Wattage affects how quickly a heater can recover heat, but higher wattage alone does not guarantee uniform temperature. A long nozzle may need carefully positioned heating zones, while a compact assembly may distribute heat more evenly with a well-fitted band. Check temperature readings near the nozzle during a normal production cycle; one sensor may miss a local hot spot. Installation conditions can also change results. I would not assume the first specification sheet tells the whole story. Verify fit and performance under real operating conditions.

Check Voltage, Temperature Limits, and Control Compatibility

Start with the machine’s supply voltage, not the heater’s appearance. Read the equipment nameplate and confirm voltage, phase, and available current. For a resistive heater, power follows P = V²/R. At half voltage, it delivers roughly one-quarter power, assuming unchanged resistance. Small mismatch, big consequences.

Check temperature limits against the barrel setpoint, startup overshoot, and cleaning cycle. A U.S. Department of Energy 2015 manufacturing bandwidth study estimates that process heating uses about 36% of U.S. manufacturing energy. That figure covers manufacturing broadly, not nozzle heaters alone, but it highlights the value of efficient, stable heating. Treat the heater’s maximum temperature as a limit, not a normal operating target.

Control compatibility matters just as much. Confirm the controller’s output type, such as relay or proportional control, and match its sensor input to the installed thermocouple. A mismatch can produce plausible but inaccurate readings. Check the switching device’s current rating against heater wattage, too. It is tempting to match only the heater’s diameter; that shortcut misses electrical and control details. Recheck the wiring diagram before installation.

Evaluate Durability, Safety Requirements, and Product Specifications

A nozzle band heater works hard through repeated heating and cooling, so durability deserves close attention. Check the sheath material, insulation, terminal design, and clamping method. These details affect resistance to vibration, heat cycling, and accidental handling. A snug fit matters. Gaps can create uneven heat and stress the heater. Still, a robust-looking shell is not proof of long service life; actual performance depends on installation and operating conditions.

Match the heater’s bore, width, voltage, and wattage to the nozzle and process requirements. Confirm the stated temperature range and lead-wire rating, too. For safety, verify grounding provisions, terminal protection, and compatibility with the machine’s temperature controller. Keep wiring clear of hot surfaces, and follow the heater maker’s installation instructions. If temperatures fluctuate sharply, independent over-temperature protection may be appropriate. A specification sheet cannot assess every real-world hazard.

Before ordering, measure the nozzle at its intended mounting point rather than relying on an old drawing. Small differences matter. Review the fit, then inspect the installed unit for loose connections, damaged insulation, or uneven contact. Even a careful selection can miss something; recheck after initial operation.

How to Choose a Duraband Nozzle Band Heater in 2026? — Evaluate Durability, Safety Requirements, and Product Specifications
Selection criterion What to evaluate Specification or practical check Why it matters
Heater construction Choose an insulation and sheath design suited to the process temperature and operating environment. Mica-insulated designs are commonly used for moderate-temperature applications; ceramic-insulated designs are available for higher-temperature service. Confirm the rated operating temperature for the exact heater. Insulation type affects heat transfer, temperature capability, durability, and resistance to thermal cycling.
Heater dimensions Measure the nozzle’s outside diameter and the axial width available for the heater. Specify the inside diameter and width in millimetres. The heater should fit the nozzle closely without being forced into place. A close fit promotes consistent heat transfer. An incorrect diameter or width can cause poor heating or installation damage.
Electrical supply Match the heater to the machine’s available supply and control system. State the required rated voltage, such as 120 V, 230 V, or 400 V, and verify it against the machine wiring and heater nameplate. A voltage mismatch can result in inadequate output or overheating. Never assume a heater’s voltage from its appearance.
Power rating Determine the required wattage from the nozzle, process, operating temperature, and heat-loss conditions. Use the equipment design or heater supplier’s calculation for the specific application; confirm the rated watts on the heater documentation. Insufficient power may cause slow heat-up or temperature instability. Excessive power can create hot spots or damage components.
Temperature capability Check both the maximum heater rating and the process’s normal operating temperature. Compare the specified maximum temperature with the required setpoint and expected temperature fluctuations. Follow the manufacturer’s stated limits. Operating beyond the heater or lead-wire temperature rating can shorten service life and create a safety hazard.
Fit and clamping Review the band closure, clamping method, clearance, and access to the nozzle. Confirm that the installed heater can be secured as designed and that its terminals and leads do not contact moving parts or hot surfaces beyond their ratings. Secure installation helps maintain surface contact and reduces mechanical strain on the heater and electrical connections.
Temperature sensing Confirm the sensor type, position, and compatibility with the machine controller. Specify the required sensor arrangement, such as a thermocouple provision, and verify sensor type and polarity with the controller documentation. Incorrect sensor selection or placement can produce inaccurate readings and poor temperature control.
Electrical safety Check grounding, terminal protection, lead insulation, and applicable local requirements. Verify the heater’s grounding provision, lead-wire temperature rating, and any required product approvals for the installation location. Proper grounding and correctly rated wiring help reduce shock, short-circuit, and fire risks.
Operating environment Consider moisture, contamination, vibration, and exposure to cleaning fluids or process materials. Request the enclosure or ingress-protection information where relevant, and confirm chemical and environmental compatibility for the specific model. Environmental exposure can corrode the sheath, damage insulation, or compromise terminals and leads.
Durability and maintenance Review expected thermal cycling, installation frequency, and access for inspection or replacement. Ask for documented service limits, recommended installation practices, and inspection guidance. Do not treat a general service-life estimate as a guarantee. Actual service life depends on fit, control accuracy, environment, installation, and operating conditions.
Documentation before purchase Obtain complete technical details for the exact configuration being ordered. Check the drawing, inside diameter, width, voltage, wattage, lead and terminal details, sensor options, temperature rating, and applicable certifications. Written specifications help prevent ordering errors and make installation and maintenance safer.
Important note Specifications and available constructions vary by manufacturer and model. Treat the checks in this table as a selection guide, not as a universal product specification. Confirm all dimensions, ratings, approvals, and installation instructions against the documentation for the exact heater.